When I first started using my Cricut machine I was so overwhelmed with all of the possibilities! There were so many projects I could do, and SO many products to buy. I wasn't sure what accessories I absolutely needed, and I wasted a whole lotta vinyl because of buying the wrong thing. I thought I would compile the must haves and my favorite products here, in case you are in the market for a Cricut machine. I have a Cricut Explore, so if you have or are getting a Maker keep in mind you have more options for materials to use.
Showing posts sorted by relevance for query cricut. Sort by date Show all posts
I don't think I need to tell you that I'm obsessed with my Cricut! I lurk in a Cricut Facebook group for people with these machines, and it's absolutely incredible what some people are making! Some women (and a few guys) are entering craft shows, selling on Etsy and making some serious money! It's so inspiring. I'm not quite ready to dive into a real side hustle, but it's so fun to feel creative and whip up a project.
Here are a few things I've been crafting lately!
This post contains affiliate and referral links.
Cricut Creations No. 2
Monday, November 18, 2019
For our anniversary this year, I asked Blake to upgrade my Cricut. I've had my Cricut Explore for a few years now, and boy has it paid for itself. It's the backbone of my Etsy store. With all the abuse I have put it through, I thought it might be time to go for their more top of line machine. (Especially, because I broke the door of my Explore and didn't know how to fix it...)
I knew I wanted the Maker 3, but I told Blake I didn't want him to spend a bunch of money on it. We found out Cricut does refurbished machines, and that's what I asked for. It was a way to save a few hundred dollars actually. The con of this is you don't get to choose your color. But, they sent me the most gorgeous powder blue color and I couldn't love it more.
GOSH, what an upgrade. This machine does a few things differently than my explore, so it took a minute to get used to the rhythm of loading and unloading. However, it's quieter and faster which is great. Additionally, it cuts far more materials than the Explore. Truly, the quality of the machine itself is just plain really nice!
I purchased an engraving blade which is just so cool, and I can't wait to experiment with it. And because I feel more inspired to create now that I have new tools, I also purchased some card making supplies. (My previous machine would have done cards as well, but I never really played with it.) Cricut now has a card making mat which is awesome! I've also enjoyed their name brand card sets. Cricut vinyl is not my favorite by any means, but their paper products are A+.
Having one of these machines has just made me feel so much more creative as I get older. I was totally that kid with a thousand paper shreds all over my bedroom floor growing up. Hobbies are just so important, even as we get older, so this has really scratched that itch for me the past few years. It's hard because it took some time to learn how to use, and I normally don't like doing things I'm not immediately good at. But, I'm so glad I've stuck with it because it's just been plain fun. I hope this means you'll see some more Cricut creations posts from me in the near future.
Shop This Post:

-Kristen
This post contains affiliate and referral links! | Blog Disclosure
My New Cricut!
Friday, March 1, 2024
With all of the extra time on my hands, you'd think I would be Cricut-ing up a storm! Honestly, I haven't had much drive to create so far. But, I have made a few things over the last few weeks I thought I'd share!
First up, shirts for my niece and nephews! I had quite a surplus of glitter vinyl, so Gia totally hit the jackpot with some cute stuff. I want her baby yoda pjs so badly!
Cricut Creations No. 3
Monday, April 13, 2020
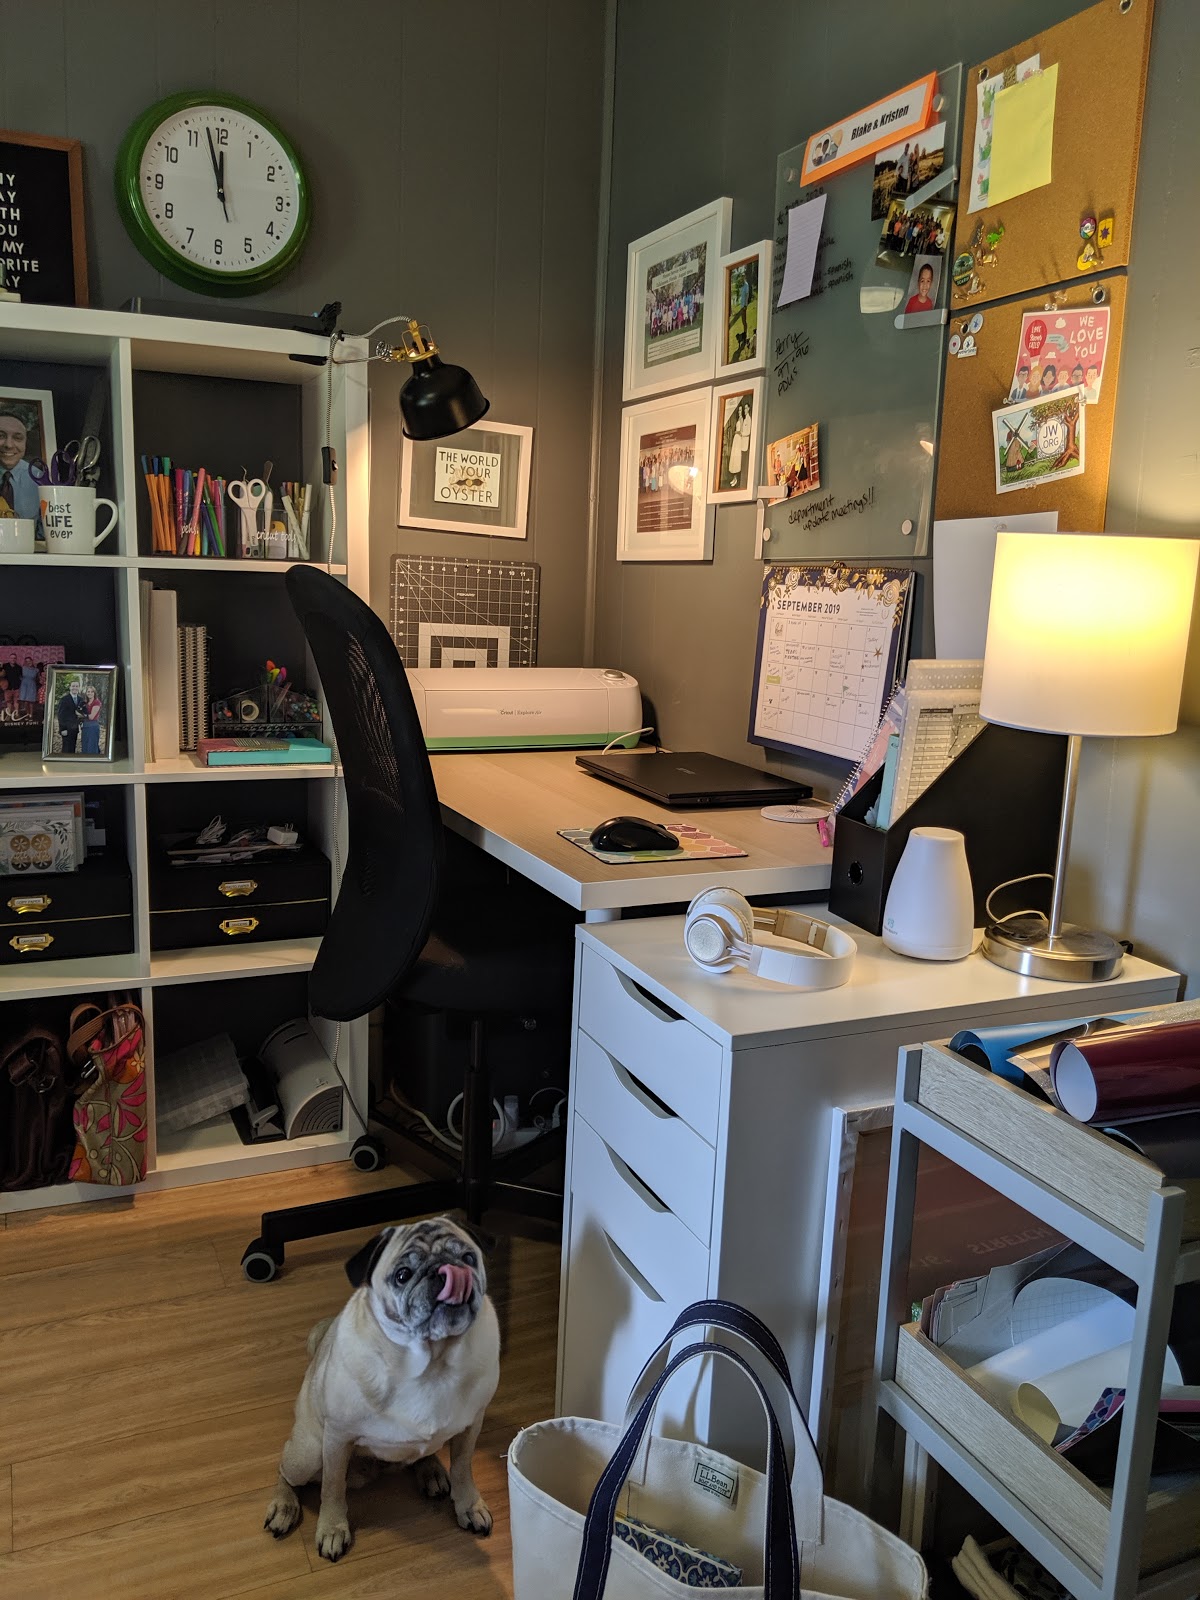
It might be the back to school season, but I have been in such a mood to reevaluate my little home office and make some changes! We shared our office makeover about a year ago when I started working from home. Previously, my husband and I shared a desktop computer and I didn't really use our home office all that often. Things have certainly changed, because the office has become the room we are in most frequently! In addition to work, Blake and I also do some volunteer construction work, and the majority of what we do is clerical, so a functional office is critical.
When I shared our mini makeover, I had not purchased my Cricut yet. My Cricut has got to be one of the best purchases I've ever made! It's quickly become my favorite thing. Crafts...gifts...I'm always using it. With the Cricut comes a certain...mess. I have accumulated quite a stash of vinyl and other supplies. But, this space still needs to function for actual work-so I had to do a little more organizing.
I wanted to share a real life look at what my work space looks like. I did not fluff it up for these photos! (I did flip a few papers around and cover up some private information.) Maybe it'll inspire you a little bit, or maybe you are like me and just nosey. =]
Affiliate links present!
Told you I didn't stage these! Look at all of those cords under the desk...yikes!
I adore this self! I love that when I'm sitting at my desk, I can easily reach over for scissors or a different pen. It was also perfect to clip my work light onto. I try to keep these shelves decluttered, but because our office wears so many different hats, I've got a lot of stuff!
One of our newest office organizers are these paper storage boxes. I found these at Walmart (similar on Amazon) and used my label maker to distinguish the drawers. I'm using these 4 drawers for paper, cardstock, photo paper, and then the last drawer for random things like sheet protectors and page dividers. Super easy to set up and they really hide the clutter. On this shelf I keep an acrylic sorter to organize my notecards. (I have another one on Blake's desk to organize bills.)
Above the other paper organizer, I have an acrylic tray where we keep random cords and chargers. I'd love to find a prettier solution but, my husband is an IT guy-there will forever be cords everywhere.
This tray came from Walmart, in the bathroom section. (Similar on Amazon)
These are my most used shelves! The top has two sets of acrylic organizers for my pens and Cricut tools. Again, I found the acrylic cups in the bathroom section at Walmart and labeled them with my Cricut. (Similar on Amazon)
If you are a pen person...I love the Stablio pens, Papermate Flair pens, and the Erin Condren dual tip pens. If you are new to Erin Condren, you can sign up for an account with my link and receive a $10 gift certificate! (Don't forget to use Ebates too!)
The second shelf contains three packs of colorful cardstock that I have yet to use! I bought it for making greeting cards with my Cricut, and I have failed everytime. Making that a goal to get right!
I also have a 3 ring binder with sheet protectors to store my vinyl scraps. It's really fun to make something using only scraps. It's like it was free!
Shelf number two also contains my main notebooks. I swear by the Erin Condren spiral notebooks. The paper quality is great and you get to customize your cover. I have a dedicated notebook for several different things. For example, one for work, one for our volunteer work, etc. (Use my referral link and that gift certificate makes those custom notebooks $10!)
I also have yet another acrylic organizer for more pens, highlighters, dry erase markers, sharpies and my washi tape. I believe that organizer came from Target. See it better in this post.
Oh! And that colorful box is where I keep the decals I sell in my Etsy shop! The box comes free when you buy some custom stationary from Erin Condren. (Also something I love! Those note cards are fantastic!)
My biggest suggestion for staying organized is to give everything a home! I'm sure you've heard "everything in its place." It really works. I've saved so many random containers and small boxes to use in my office! The little bowl holding all of my memory cards and flash drives? A tealight holder. The bigger one next to it, holding my giant paper clips? The ceramic bowl that came with my dish brush!
On top of the shelf is where I keep our letterboard. I shared how I organize all of those little letters in this post! I love the letterboard, because it's an easy way to change things up. I also store our paper cutter and my button maker on the top. They don't fit anywhere else!
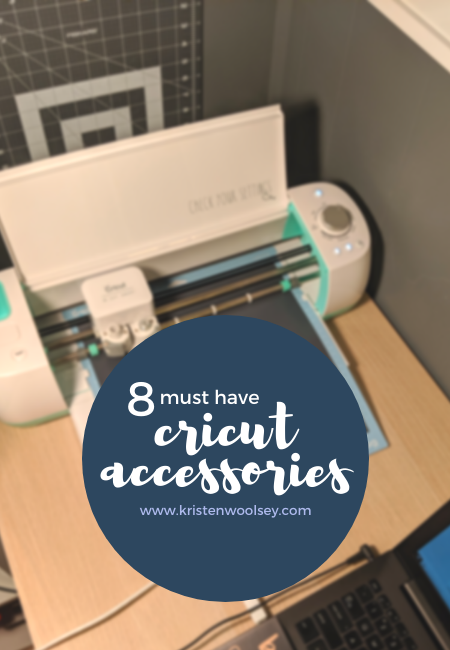
Isn't it beautiful!? Haha, I really do love that thing. I started a tag on my website so that you can follow along with my Cricut creations. I make use of the vertical space and hang my sticky mats on either side of the bookshelf.
Command hooks are my best friend!
January?! Nope, it's still September, I just hid my current calendar so you can't be extra nosey. This is what I look at the most, besides my screen. I have the glass dry erase board from Ikea, two cork boards and a few photos I love. In addition to my monthly calendar.
Laptop is an Asus, which has been great. Mouse pad and notebook are Erin Condren. The notebook is sitting on an acrylic stand, also from EC.
I recently added my Disney pins to my corkboard and it always makes me smile! Previously, I had them on my backpack that I took the the parks. Last time we were there 2 of my pins popped off and I decided I didn't want to risk it anymore. This is a fun way to see them everyday! I kind of started a dog collection.
On top of the drawer system from Ikea, I have another lamp. It's best feature is that it has a USB port at the base, so it's so convenient to charge my tablet and my wireless headphones. Another new addition to this area is this black file box. It was a super easy and cheap way to organize a few things that just floated around before.
I also love diffusing calming essential oils while I work. This diffuser was really inexpensive, but works really well. (Here are some of my favorite diffuser blends!)
Wanna look inside my drawers?
The absolute key to keeping drawers organized is using sorters!! These drawers always look like this. It's because everything has a spot. The top drawer has an Ikea organizer that was meant to go with this piece. It fits perfectly! The next two drawers are a combination of old boxes I've kept and drawer sorters from Walmart. You do not need to go out and buy drawer organizers! (Although the Dollar Tree has a great selection for $1.) Save packaging and use that! All of my button making parts are stored in a gift box from one of Blake's anniversary presents last year.
Alright, here is further proof I did not clean up! This rolling cart is home to all of my Vinyl. The top has my HTV (for fabric), my stencil paper, and transfer paper rolls. The middle shelf holds all of my traditional vinyl. There is a lot. It used to be in cute little rolls, but my stash got too big. I have just about every color they make.
The bottom shelf holds some blanks. A few tea towels, t-shirts, some plain water bottles...just stuff that I can use to whip together a quick gift. I also have a few canvases tucked away for my next reverse canvas projects.
Okay guys, your turn! Let's talk in the comments below. Tell me what you think! Could you work in this space? How do you stay organized? Do you even have a home office?
You may like: Our Home Tour
This post contains affiliate and referral links!
Home Office Organization Tour
Monday, September 16, 2019
I hope you guys find this interesting. My Cricut has quickly become one of my favorite things! It's rare if I go two days without whipping up a little something. The possibilities with this machine are literally endless, so it's been really fun and interesting to try out different projects. I thought I'd share a few recent creations with you today!
Matching Shampoo and Conditioner Bottles
This is one of those things that is totally unnecessary, but I am in absolute love with. I made two sets of matching shampoo, conditioner, and body wash bottles for both of our bathrooms. The bottles are from Amazon. The bottles are 32 oz, which is huge! It was basically a bottle and a half of my favorite shampoo, and that should last months and months.
I've gotten so many compliments from guests, and a friend actually ordered a set from me for her airbnb!
Side note: I started using this body wash and I could not love it more. It's got fairly clean ingredients and it smells so stinkin' good.
Reverse Canvas
I think this is my favorite project to date! A reverse canvas is just what it sounds like. You buy a traditional canvas from a place like Walmart or Michaels. This one was about $8 for a pack of two canvases. You remove the canvas fabric from the frame, paint or stain the frame, iron on a heat transfer vinyl (that you cut with your Cricut) and then reattach the canvas.
I made this one for my in-laws anniversary this year. It's a few verses from their wedding song, and their wedding date at the bottom. It turned out really beautifully and they loved it. It's such an inexpensive project, but it looks SO swanky.
My brother's wedding is next month, so I'm going to attempt a much bigger reverse canvas for their reception.
Cups Galore
The first thing I mastered on my machine were vinyl decals! I'm having so much fun making them and trying out different designs. Holographic vinyl is so cool looking!
If you have a machine, I could not recommend 651Vinyl.com more! They have the best prices, and they ship super fast.
Print and Cut
This took me hours to master, but it's been life changing. I am helping a friend make buttons (pins? I'm not sure what to call them) with my button maker. I've been hand cutting circles all this time, and then it dawned on me that I have a cutting machine! Duh.
It took some trial and error to figure out the settings, but now I know what I'm doing! You can print directly from the Cricut design software and it can read the image to cut it for you. My production has gone through the roof.
Easy Gifting
The best thing, by far, about owning this machine is easy gifting! We've had several things come up recently that I wanted to have a gift for and I've literally been able to whip something up on the fly. I am keeping a small stash of things like cups, tea towels, and T shirts. It's been so easy to put something together and everyone loves a personalized gift.
This was something my mom commissioned. She has been working in disaster relief in the Panama City area after hurricane Michael. She made some friends helping out in a kitchen and she wanted to get them something. All she told me was that this lady loves purple and she is always saying "Butter makes me happy."
I bought this pack of blank tea towels on Amazon for less than $15 and have been able to make 4 separate gifts with it. Still plenty more to use too!
Talk to me! Leave a comment below and tell me which project is your favorite! What have you been DIYing lately?
This post contains affiliate links at no cost to you!
Cricut Creations
Monday, June 10, 2019
Reverse canvases are by far my favorite Cricut project to do! They are fairly simple, quick, and inexpensive. All while being highly customizable and looking far more complex than they actually are.
I thought I'd share the simple steps to take if you want to make some of your own!
You will need:
A die cutting machine
Heat transfer vinyl
Scissors
Measuring tape
Staple remover or flat head screwdriver
A Canvas
Paint or stain
Paint brush
Iron or heat press
Staple gun
Optional: Saw tooth hanger
Hammer
Hot glue gun
Ribbon
Before you can start, you need a design! I am sharing a project I made as a gift for my friend. I saw she had pinned a quote on Pinterest, and I used that as my springboard.
The size of the canvas you purchase will help you determine how wide your design should be. Cut your design on HTV (heat transfer vinyl). Remember to check your settings and cut shiny side down.
Step One
Carefully remove the canvas material from the wooden frame. We usually use a flat head screwdriver, but you can also use a heavy duty staple remover. I usually buy a two pack of canvases from Walmart for about $8. The larger canvases will most likely have a center support piece of wood that you can remove with a little pulling.
Step Two
Paint or stain your wooden frame. I've done both! Chalk paint works like a charm, but staining gives such a beautiful look. Allow to dry, and apply a second coat. Let dry completely!
Step Three
While your paint dries is the perfect time to iron on your design. Center as best as possible, but you do have a little wiggle room. Press your design according to HTV instructions. I always place a thin cloth between my iron and my design while pressing. Generally, when the texture of the canvas is visible through your HTV, you have pressed well enough.
Step Four
Reattach the canas to the back of the painted or stained frame with a staple gun. Trim the edges of the stapled canvas, so you can't see it from the front. For a more finished look, you can hot glue a ribbon over the staples. I also like to attach a sawtooth picture hanger for ease of display.
Here are two other reverse canvases I've done recently. The welcome sign is an example of a stained frame (my favorite look so far!) and the second sign is a similar color scheme to the one above.
I noticed that the canvases I get from Walmart are white on one side, and more natural on the back. You can use either side and it will change the look of your sign! One the welcome sign I used the white side, and on the black frames I used the natural side.
Talk to me! Tell me what you think in the comments below!
Cricut Tutorial | How To Make A Reverse Canvas
Monday, August 5, 2019
This post is going to make me seem like an old lady, but this is the kind of stuff that gets me excited! Clothes and makeup don't do it for me quite like home improvement does. None of this is super glamorous, but I wanted to share a few things we've purchased this year that have made our lives easier and better!
This post contains affiliate links!
Best Home Purchases of 2019
Monday, December 2, 2019
Practicing Hiking Outfits
I'm sure it's no surprise to you that I am Type A enough to practice outfits months in advance, right? For our tenth anniversary early next year, we are doing an amazing trip to see the Grand Canyon, Monument Valley, Antelope Canyon, and other really cool stops. We've already mapped out several hikes and even a horseback tour. It's going to be fairly cold when we go, so we've been stocking up on cool weather hiking gear. I'm obsessed with my LL Bean hiking boots! Our trip includes something like 6 hikes, and we are going to attempt to only bring carry-ons...so maybe you can see why I am thinking so far ahead.
Life Lately #8
Thursday, December 19, 2019
One thing that Blake and I have always done is keep up with our respective Amazon wish lists. These lists serve two main functions for us. One, it helps us know exactly what each other would like to receive as gifts. Admittedly, we both have pretty specific tastes, so this eliminates all doubt. We know exactly what each other wants. And, secondly, these wish lists are so great at helping you bookmark things for later. I often add things to the list just to keep an eye on the price, or to see if I really truly want that item.
Want a little insight into what I'm shopping for? Well, here's a peak at my list!
P.S. I actually keep an entirely separate list for books! If the price drops or there is a special deal on a book, Amazon notifies me. (This is actually one of the tips I share in my How I Save Money on Books post!)
I'm Shopping For:
Welcome Sign
I had a wreath on our side door (the door we use), and ending up moving it and now I feel like I need something for that door! I thought this sign was cute and would work well.
Cricut Maker
I have an Explore, and love it to pieces. It's paid for itself 10 times over with my Etsy shop. But, I would like to upgrade one day, and this is what I have my eye on.
Cricut Easy Press
Again, this is something that I would like to get in the future. I've been making it just fine just using my home iron. But, this would be a little luxury and I know I'd enjoy using it.
Thermal Printer
Another wish list item for my Etsy set up. I use my regular printer for shipping labels, but I would love to get a thermal printer for labels and stickers.
Rocking Chair and Table
Our front porch is lacking some kind of chair, and I keep coming back to this. Simple, but classic. And I think I could throw a seasonal cushion on it for fun.
Glass Dome Diffuser
What's really on my wishlist is the Young Living Aria diffuser, but it's so expensive. I thought this really fit the look - but a much lower price. Pretty solid reviews too.
Dog Car Seat
Is this completely ridiculous? Probably. But, I can't help it, I want it! The problem is I have 3 dogs, and it would be pretty ridiculous to spend this much on 3 dog car seats. Especially because it would just be for rides to vet every so often.
Set of Skinny Belts
I really like these! I love that it comes in 2 colors. Seems like these could jazz up so many different outfits - especially dresses.
Hardcopy of The Body
I LOVED this book. It was so interesting. I listened to the audio, and thought many times how I wished I had the hard copy so I could highlight it up and down.
Rose Gold Watering Can
Like most people during the Pandemic, I acquired quite a few house plants. Most of them are doing great! But, I feel kind of funny using a disposable plastic cup over and over to water them. This mini can would be so convenient and a lot cuter.
Ninja Smoothie Blender
It's becoming abundantly clear that our blender is about to give up. I really like this option, since we mainly use our blender for smoothies or protein shakes.
Shop This Post:

-Kristen
This post contains affiliate and referral links! | Blog Disclosure
Amazon Wishlist
Monday, April 3, 2023
Subscribe to:
Posts
(
Atom
)