SOCIAL MEDIA

Showing posts with label DIY. Show all posts


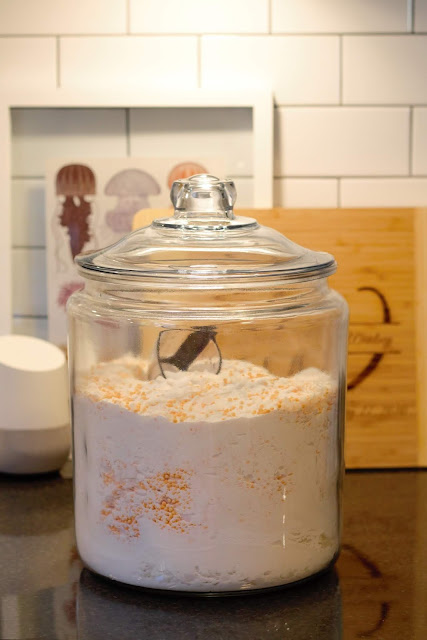
If you take a trip through the blog archives, I originally shared my DIY Laundry Powder recipe in 2018. I got away from making my own in the last few years, but after a bad reaction to traditional laundry soap I decided to get back to it! This is such a budget friendly solution to the rising prices in the grocery store. 

My recipe has evolved a little bit, so I thought I'd share the updated version!

This recipe is to fill my 2 gallon glass jar, which is enough detergent to last about a year.
Mix the following together:
1 - 4lb Box Borax
1 3.7lb box Washing Soda
2 Bars Grated Fels-Naptha OR 1 17oz Box Zote Flakes
2lbs Epsom Salts (Optional)
1 3lb Tub Oxiclean (Optional)
Scent Booster (Optional)

Use 1-2 Tablespoons per load

Tips:
- This is much easier to make if you put all the ingredients into a trash bag to mix, instead of trying to use a spoon. 

- I have a HE high capacity washer without an agitator. I use 2 tablespoons per load because I can fit a lot in one load. For smaller loads of just a few things I use 1 tablespoon. If you have a smaller capacity washer 1 tablespoon should suffice.

- Keep in mind that the Oxiclean is optional. The rest of the ingredients will still get your clothes clean, but I like the boost in whitening.
 
- The scent is also optional. Without it, your clothes will just smell clean. Not including the scent will make this ideal for people with fragrance sensitivity. I got a trial size scent booster and that does it for me.

- There some mixed opinions on including epsom salt. It's said to have softening abilities, but some might choose to omit depending on their water hardness. You can also use plain white vinegar as a softener. Epsom salt hold onto scent well too, so you can add a few drops of essential oils to your salts for an added scent. 


And, because sharing is caring, I now offer my Laundry Soap vinyl decal over on Etsy! I love this font, because it's like my handwriting - but better. Blog readers get a discount when they use the code: kristenwoolseyblog at checkout!

Shop This Post:


-Kristen

This post contains affiliate and referral links! | Blog Disclosure

Updated DIY Laundry Detergent Recipe

Monday, June 23, 2025

Recently, I helped throw a graduation party for a sweet high school senior that we adore. He has a single dad, and poor ole dad said he felt clueless when it came time to this special celebration. Several of us jumped in to help, and I volunteered to help with decor! We went with a fun Spiderman inspired theme, since that was our graduate's favorite. Decorating is my favorite part of throwing a party anyway, so this was my pleasure. 

I've been wanting to do a DIY photo booth set up ever since I helped throw my cousin's 15th anniversary party last year. We ended up hiring someone for that party and it was worth every penny because all the guests LOVED it. Hiring someone wasn't in the budget for this party, so I decided to go for it and try it myself. 
After a ton of research, I landed on using an iPad and the app Lumabooth. Full transparency, I didn't have an iPad until a week before this party. I wanted to use my Samsung tablet, but the android photobooth apps are just not as good, and I just kept going back to Lumabooth. An iPad was something I was planning on buying in the near future, so I went ahead and pulled the trigger once I was positive that's what I wanted to use. 

Lumabooth is very user friendly, both on the set up side of things, and the actual party guest side of things. You can full customize what photo options you want to offer .For example: filters, videos, gifs, photo strip layouts...etc. 

I set up the option for photos and a gif. The guest hits the photo icon, takes a few shots and then can text or email it to themselves. It also saves all the pictures locally, so I have every picture taken all night. Perfect for the guest of honor, because they can have all the pictures when the party is over.


 A backdrop was my next big decision. I ended up purchasing a set from Hobby Lobby. It's an easy to set up frame, and then you can string up a curtain or piece of fabric along the top. They had one backdrop cloth for sale that fit perfectly, and I liked silver for the party theme anyway. I might grab another piece of fabric for future events, but I think the silver will match most things. The only negative about this size of a back drop is that your iPad will be quite close to keep it in frame. Works for groups of 3-4, but any bigger and we had to move it back and expose the wall behind the back drop. I might use an entire wall as a backdrop in the future for large groups. 

Having props was a huge hit. The kids loved it especially! I purchased various props from the dollar store and I grabbed several from Hobby Lobby as well. 


We purchased this ring light that has a tablet holder. The light itself is awesome! The tripod was not the most stable, but it did a perfectly fine job. People are touching the tablet a lot, and I think I would prefer something more sturdy just for my own peace of mind. I also purchased a protective case for the iPad that I felt was necessary and did not interfere with the fit on the tablet holder. You might also want a screen protector

The App makes it very easy for your guest, but I stayed near by to help. I also wanted to be the one to adjust the tripod if we needed to raise or lower the height. I underestimated how much the little brothers would want their picture taken. 😂 

I had so much fun with the Spiderman theme. When I searched for party ideas on Pinterest, all that came up was little kid birthday party ideas. I wanted something worthy of a High School senior! We went with black table cloths, these really amazing red foil Spiderman runners, and a bucket of candy as a centerpiece. Then I mainly brought in the theme with the colors in the balloons, and a couple of up lights I borrowed from a friend. I also did a poor drawing of Spiderman on my chalkboard I faithfully bring to just about every party ever. 

Shop This Post:

-Kristen

This post contains affiliate and referral links! | Blog Disclosure

DIY Photobooth Using An iPad & Lumabooth

Friday, May 31, 2024

Since moving into our new home last August, we've had to do very little! That's such a change for us, because the home we owned for a decade was SUCH a money pit when it came to updates and maintenance. That's the difference between a house built in the 1950s and one that's just a year old. It's been a blessing for sure. We did put in a backsplash, but that's about it! 

One thing though that we did want to eventually do is our boardwalk. We live in a row house, so we park in the back and use a boardwalk to the side door. (Our front door faces greenspace.) This boardwalk was pretty basic, but it really bothered us that it didn't have railings. So we had a contractor build a great railing and some privacy slats, and then this weekend we were able to stain it finally! 

Here's what we were working with:


And here's what we were able to do:


We only have a small flower bed, and no yard to speak of. Which has been such a treat! Our old house was high maintenance with almost an acre of daunting yard work, so this is bliss! I did miss a little bit of it though, so I'm thrilled to have found these flower boxes to add a little life into our place. They were easy to put together and I might add another down the line for some herbs. 

The color of stain is just right too! It matches our front door and another accent on the house perfectly. Plus it had a sealer built in, so it will really keep the deck nice! We also added a few solar lights to the railing, and that's been such a nice touch at night. 

The side door was so plain, so I just had to add some vinyl! I loved this design so much, I added it to my Etsy shop. I hope it will help the door more look more inviting to our guests. It is a little bit weird that our front door isn't the main door we use, I've never lived in a house like that before.

I originally bought a wreath for the side door, and ended up loving it on the front door, so I had to buy a second one. 😂


In addition to the boardwalk project, we were able to get some scrubbing done - and I officially feel like I got my spring cleaning checked off the list!

Shop This Post:


-Kristen

This post contains affiliate and referral links! | Blog Disclosure

A Weekend Project | Our Boardwalk

Monday, May 23, 2022

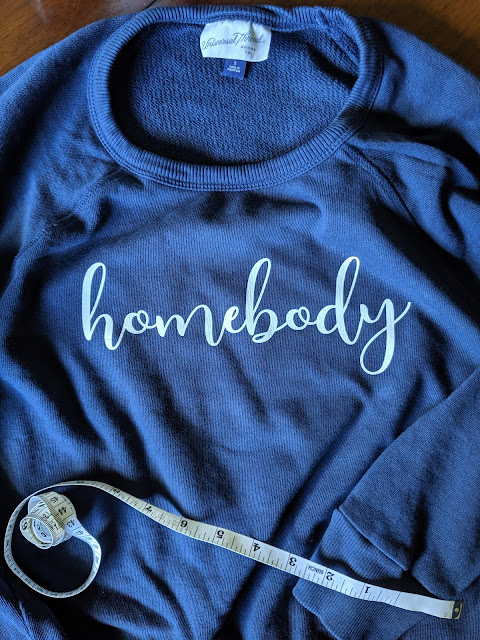
I don't think I need to tell you that I'm obsessed with my Cricut! I lurk in a Cricut Facebook group for people with these machines, and it's absolutely incredible what some people are making! Some women (and a few guys) are entering craft shows, selling on Etsy and making some serious money! It's so inspiring. I'm not quite ready to dive into a real side hustle, but it's so fun to feel creative and whip up a project. 

Here are a few things I've been crafting lately!
This post contains affiliate and referral links.
Cricut Craft -Homebody Sweatshirt | www.kristenwoolsey.com

Cricut Creations No. 2

Monday, November 18, 2019

Reverse canvases are by far my favorite Cricut project to do! They are fairly simple, quick, and inexpensive. All while being highly customizable and looking far more complex than they actually are. 
Cricut Tutorial | How To Make A Reverse Canvas

I thought I'd share the simple steps to take if you want to make some of your own! 
You will need:
A die cutting machine
Heat transfer vinyl
Scissors
Measuring tape
Staple remover or flat head screwdriver
A Canvas
Paint or stain
Paint brush
Iron or heat press
Staple gun
Optional:   Saw tooth hanger
Hammer
Hot glue gun
Ribbon

Before you can start, you need a design! I am sharing a project I made as a gift for my friend. I saw she had pinned a quote on Pinterest, and I used that as my springboard. 

The size of the canvas you purchase will help you determine how wide your design should be. Cut your design on HTV (heat transfer vinyl). Remember to check your settings and cut shiny side down. 


Step One
Carefully remove the canvas material from the wooden frame. We usually use a flat head screwdriver, but you can also use a heavy duty staple remover. I usually buy a two pack of canvases from Walmart for about $8. The larger canvases will most likely have a center support piece of wood that you can remove with a little pulling. 


Step Two
Paint or stain your wooden frame. I've done both! Chalk paint works like a charm, but staining gives such a beautiful look. Allow to dry, and apply a second coat. Let dry completely!


Step Three
While your paint dries is the perfect time to iron on your design. Center as best as possible, but you do have a little wiggle room. Press your design according to HTV instructions. I always place a thin cloth between my iron and my design while pressing. Generally, when the texture of the canvas is visible through your HTV, you have pressed well enough. 


Step Four
Reattach the canas to the back of the painted or stained frame with a staple gun. Trim the edges of the stapled canvas, so you can't see it from the front. For a more finished look, you can hot glue a ribbon over the staples. I also like to attach a sawtooth picture hanger for ease of display.


Here are two other reverse canvases I've done recently. The welcome sign is an example of a stained frame (my favorite look so far!) and the second sign is a similar color scheme to the one above. 

I noticed that the canvases I get from Walmart are white on one side, and more natural on the back. You can use either side and it will change the look of your sign! One the welcome sign I used the white side, and on the black frames I used the natural side. 


Talk to me! Tell me what you think in the comments below!

Cricut Tutorial | How To Make A Reverse Canvas

Monday, August 5, 2019

I hope you guys find this interesting. My Cricut has quickly become one of my favorite things! It's rare if I go two days without whipping up a little something. The possibilities with this machine are literally endless, so it's been really fun and interesting to try out different projects. I thought I'd share a few recent creations with you today!

Matching Shampoo and Conditioner Bottles
This is one of those things that is totally unnecessary, but I am in absolute love with. I made two sets of matching shampoo, conditioner, and body wash bottles for both of our bathrooms. The bottles are from Amazon. The bottles are 32 oz, which is huge! It was basically a bottle and a half of my favorite shampoo, and that should last months and months.  

I've gotten so many compliments from guests, and a friend actually ordered a set from me for her airbnb! 

Side note: I started using this body wash and I could not love it more. It's got fairly clean ingredients and it smells so stinkin' good. 


Reverse Canvas
I think this is my favorite project to date! A reverse canvas is just what it sounds like. You buy a traditional canvas from a place like Walmart or Michaels. This one was about $8 for a pack of two canvases. You remove the canvas fabric from the frame, paint or stain the frame, iron on a heat transfer vinyl (that you cut with your Cricut) and then reattach the canvas.

I made this one for my in-laws anniversary this year. It's a few verses from their wedding song, and their wedding date at the bottom. It turned out really beautifully and they loved it. It's such an inexpensive project, but it looks SO swanky. 

My brother's wedding is next month, so I'm going to attempt a much bigger reverse canvas for their reception. 


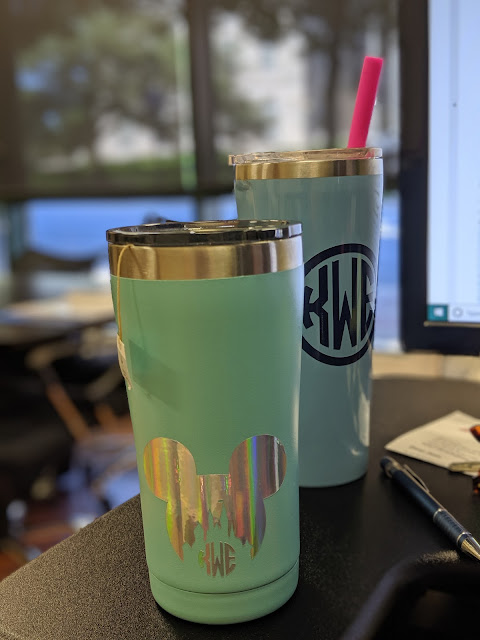
Cups Galore
The first thing I mastered on my machine were vinyl decals! I'm having so much fun making them and trying out different designs. Holographic vinyl is so cool looking! 

If you have a machine, I could not recommend 651Vinyl.com more! They have the best prices, and they ship super fast. 


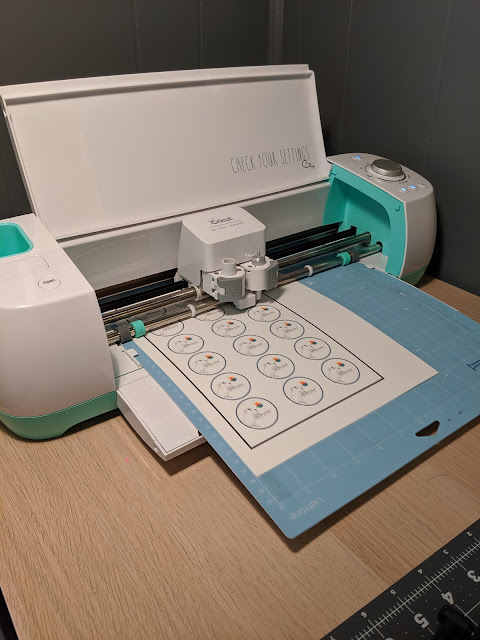
Print and Cut
This took me hours to master, but it's been life changing. I am helping a friend make buttons (pins? I'm not sure what to call them) with my button maker. I've been hand cutting circles all this time, and then it dawned on me that I have a cutting machine! Duh.

It took some trial and error to figure out the settings, but now I know what I'm doing! You can print directly from the Cricut design software and it can read the image to cut it for you. My production has gone through the roof. 

Again, the possibilities are endless here. Print and cut is how all of those Etsy people make stickers! I definitely what to try that next.

Easy Gifting
The best thing, by far, about owning this machine is easy gifting! We've had several things come up recently that I wanted to have a gift for and I've literally been able to whip something up on the fly. I am keeping a small stash of things like cups, tea towels, and T shirts. It's been so easy to put something together and everyone loves a personalized gift. 

This was something my mom commissioned. She has been working in disaster relief in the Panama City area after hurricane Michael. She made some friends helping out in a kitchen and she wanted to get them something. All she told me was that this lady loves purple and she is always saying "Butter makes me happy." 

I bought this pack of blank tea towels on Amazon for less than $15 and have been able to make 4 separate gifts with it. Still plenty more to use too!


Talk to me! Leave a comment below and tell me which project is your favorite! What have you been DIYing lately? 
This post contains affiliate links at no cost to you!

Cricut Creations

Monday, June 10, 2019


Over the last two years or so I've been striving to make conscious switches to more "healthy" products. I've switched to natural deodorant, natural toothpaste, and even wool dryer balls! Think Dirty is a very helpful app to use when trying to find out if the products you are using are toxic. I was very surprised to see the ratings on a lot of the things I was using! It's alarming. 

Cleaning products are just as important to pay attention to. The fragrances in cleaners alone were enough to make me want to find an alternative! Trash bags and Swiffer pads have scents, for goodness sake! Getting a headache every time I cleaned was getting really old. 

I shared a few recipes for homemade cleaners with you in 2017, and to be honest, I've sort of eliminated all of those in favor of the one I'm sharing with you today! In fact, I started making this cleaner last summer, and have been testing it for the past few months to make sure it was something worth sharing. That also allowed me some time to make a few tweaks. 

You may have heard of Thieves essential oil. It goes by a few different names within the EO community...Thieves, Fighting Five, On Guard, or Nature's Shield  to name a few. If you want to make it yourself, it's a blend of 5 powerful essential oils: clove, cinnamon, rosemary, lemon and eucalyptus

(By the way, I am not a distributor of any brand of essential oils. I think you need to do your research and pick what looks best to you and your budget. However, there are affiliate links present within this post.

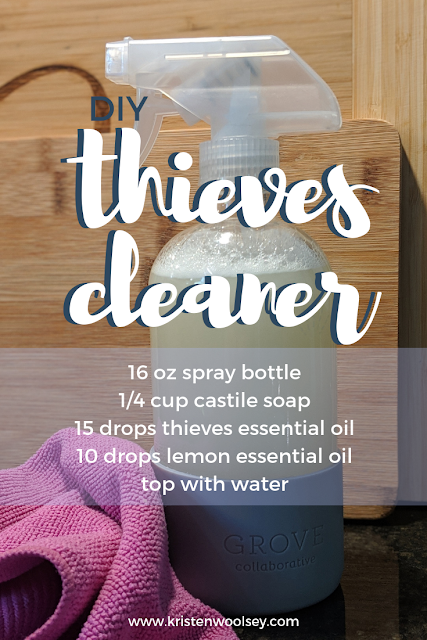
DIY Thieves Cleaner Recipe from kristenwoolsey.com

Here is the recipe for harnessing those oils into an all purpose cleaner!
Combine the following in a 16 oz spray bottle:
1/4 cup Castile Soap
15 drops thieves essential oil (or your own combination of clove, cinnamon, rosemary, lemon and eucalyptus essential oil.)
Optional: 10 drops lemon essential oil
Top off with distilled water.
Shake before use!
Depending on the job, wipe away with a dusting cloth or a damp sponge. Rinse if needed.

At this point I have a bottle of this cleaner in both bathrooms and my kitchen. I use it on just about everything! I use it to spray down my bathroom, dust my furniture, and I've used it to clean up spills. I've even seen it do amazing things in a moldy situation. The only thing I don't love using this cleaner on is mirrors. It does contain soap, so it streaks. For mirrors, I have been using E-cloths and water-which is pretty much amazing! 

My spray bottle and castile soap are from Grove Collaborative. But, I've also used these bottles from Amazon and they work great. And who doesn't love Dr. Bronner's Castile soap? And in case you are wondering, I'm using the NOW brand for this EO blend. I tired making my own blend, but, I put in way too much clove, which I think I might have a sensitivity to. It's going to be a little bit of an experiment if you decided to make your own blend! It was worth it to me to buy it pre-blended.

While I haven't completely eliminated every household cleaner from my repertoire, this one really does cover most jobs! Adding in that extra lemon EO will really make this cleaner smell extra good too!

Leave a comment below if you are interested in eliminating toxic products from your life! Are you slow about making swaps like me, or are you gung ho? Do you make your own cleaners or do you stick with an old faithful from the store? Let me know if you like to see what else I have in my cleaning caddy!

This post does contain affiliate links at no cost to you! Thank you for supporting Pugs & Pearls!

DIY Thieves Cleaner Recipe

Monday, February 4, 2019

DIY Powdered Laundry Detergent Recipe

I first shared this recipe almost 5 years ago when I first started blogging, on a different blog. I had to go back through the archives to find it and that was a blast from the past! It's really cool to see how much my blogging style has changed. 

Anyway! This summer I really started reexamining our budget and looking for ways to cut back here and there. It dawned on me that I used to make my own laundry soap years ago and I can't believe I stopped. I think it was a combination of convenience and missing a stronger scent in my laundry. (I've fixed that though!) 

I whipped up a fresh batch, and thought I'd share the recipe with you today. It's really simple to do and I've been loving my updated recipe. I'm also loving the savings! For the past year or so I've consistently bought Method's Ginger Mango liquid detergent. It's $14.99 on Grove and each bottle does 66 loads, which lasts me about 6 weeks. (11 loads a week! I was thinking that sounds kinda high, but we do at least 4 loads of clothes, we change our sheets once a week so that's 2-3 loads of linens, and towels, throw blankets, dog beds, cleaning towels...it adds up!) 

This DIY powdered detergent cost me $26.73 and it will last me over a year! I was able to find all of my ingredients at Walmart, but I will link some sources as well. Amazon's prices on this stuff is crazy, so definitely shop local first! 

DIY Powder Laundry Detergent Recipe

Here is what you do:
Mix the following together:
1 4 lb box Borax ($4.47 at my Walmart)
1 3.7 lb box Washing Soda  ($3.97 at my Walmart)
2 bars Fels-Naptha or Zote Soap, grated (I bought already grated Zote from my Walmart for $2.38)
1 3 lb tub Oxiclean (Optional) ($6.92 from my Walmart)
Scent Booster (Optional) ($8.99 from my Publix)
Use 1-2 tablespoons per load!
Printer Friendly 

DIY Powder Laundry Detergent Recipe

I ended up using the same Method scent in this recipe and it was the perfect compromise! It still smells great, but it's much more affordable.

A few tips:
- I suggest mixing the ingredients in a trash bag, shaking well to combine and then pouring it into your desired container. 
- Alternatively you can layer the ingredients and mix as you go. 
- I bought a glass container similar to this one at Walmart. I believe it was $17. 
- I have a HE high capacity washer without an agitator. I use 2 tablespoons per load because I can fit a lot in one load. For smaller loads of just a few things I use 1 tablespoon. If you have a smaller capacity washer 1 tablespoon should suffice. 
- Keep in mind that the Oxiclean is optional. The rest of the ingredients will still get your clothes clean, but I like the boost in whitening. 
- The scent is also optional. Without it, your clothes will just smell clean. Not including the scent will make this ideal for people with fragrance sensitivity. 

Okay, guys, leave me a comment below! Are you going to try it out?! Have you made your own detergent? Leave any tips you have! How do you feel about doing laundry? Is it your favorite or least favorite chore?

DIY Powdered Laundry Detergent Recipe

Monday, August 13, 2018


Hello!

Hi friends! I'm Kristen, and this is the Life and Style of a mid 30's Floridian living the Best Life Ever, with her husband and two pugs. Runner | Avid Reader | Small Shop Owner